You may find from time to time that you need to set up a financial adjustment on your system that will reflect in the bill to your tenants and also show within your accounting system.
Adjustments can be set up for anything on the system but in this article we will focus on 'General Adjustments'. Before you begin you must know how you wish to your adjustments to reflect in your accounts. This article will use a specific example to guide you through the process.
Example 1
You need to set up a one time general adjustment for a lease to create an additional charge to the tenants because they damaged a window. The agreed amount is $100 which is an account charge and ultimately a debit to your own accounts as you are receiving additional funds.
Example 2
On the opposite side, you need to set up a one time general adjustment for a lease to allow the tenants a rent reduction of $100 because of near by construction noise. This would be considered an account credit as it is a credit to your accounts, i.e. a reduction.
It is very important that all general adjustments are listed as 'income' with the adjustment codes to ensure that they link to the correct account.
Step 1
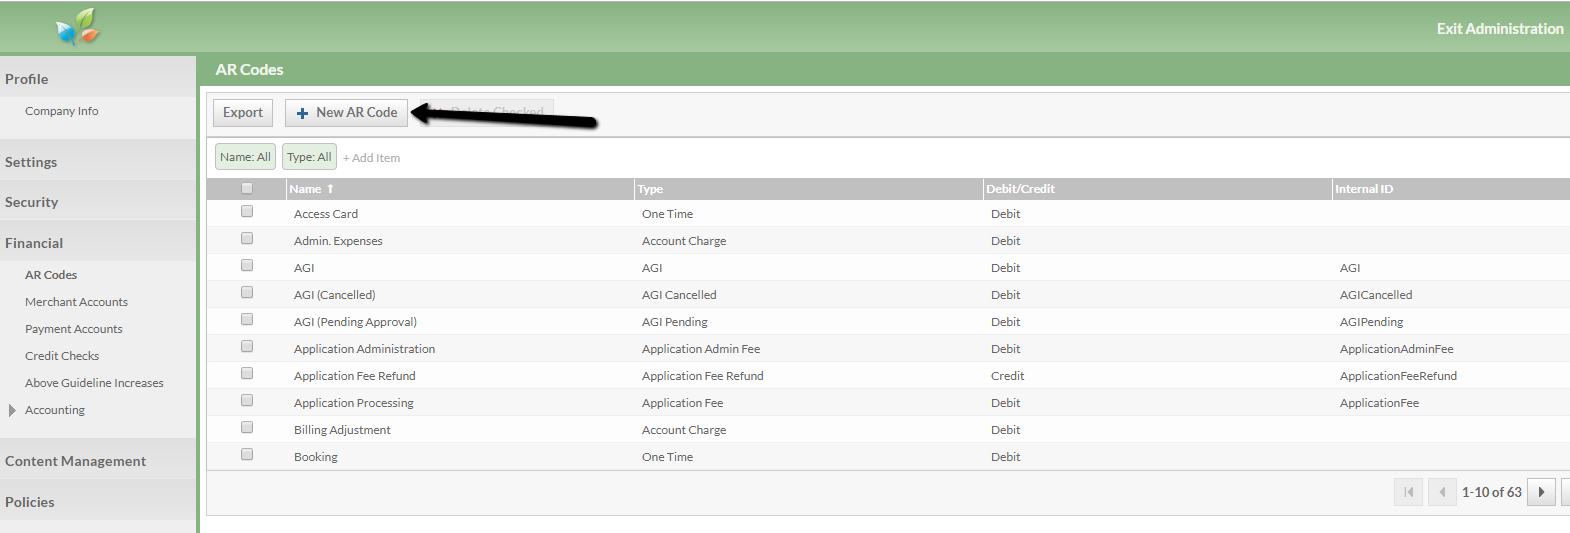
To begin, you will likely wish to start by creating a new AR code for your specific adjustment. For this example I am going to use Example number 2 as a credit version.
Administration --> Financial --> AR Codes --> New AR Code
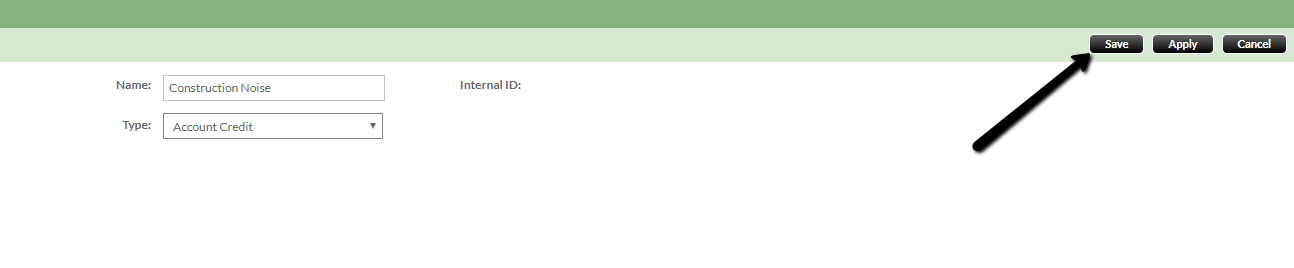
Name- Call this whatever describes your adjustment the best so you can recognise this on your accounts- in this case 'construction noise'
Type- For a general adjustment you only need to decide whether you want account credit or account charge. In this scenario we would choose 'account credit'
SAVE
You can now go back to double check your new code has appeared;
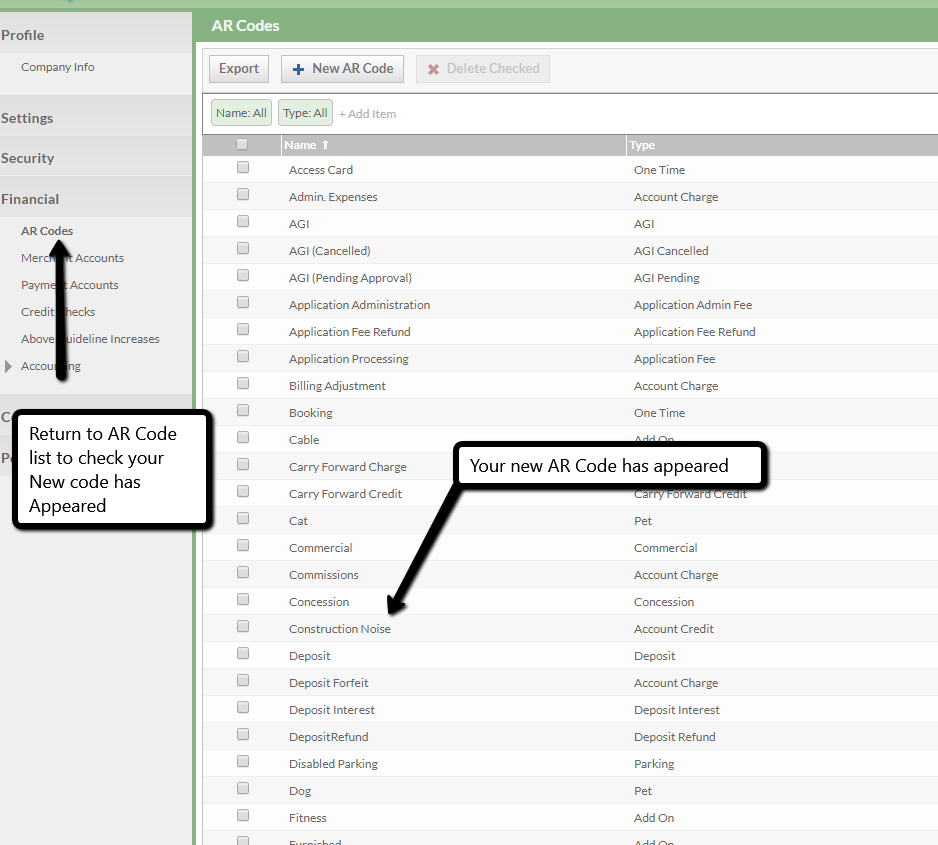
You have now created your new code but this is only on the leasing side. Now we must map it so it shows correctly in your accounting.
Step 2
You must choose which GL account you wish to map this adjustment to. As previously mentioned this is an income general adjustment.
If you need to create a new GL that fits your needs please see the link below which explains how to create a new GL account.
https://propertyvista.zendesk.com/hc/en-us/articles/115004174307-Adding-General-Ledger-Accounts
Now we can proceed to mapping our adjustment.
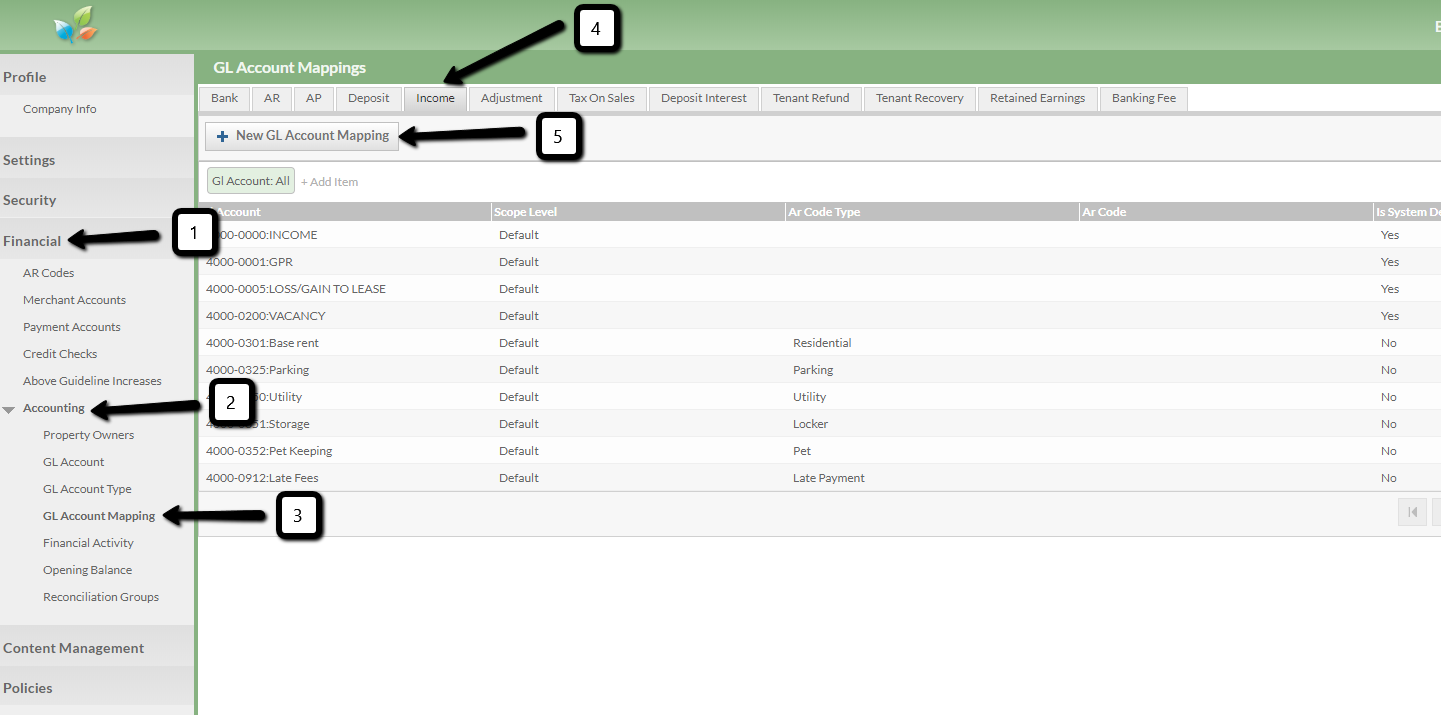
Administration --> Financial --> Accounting --> GL account Mapping. Along the top tabs you are looking for 'income' as we are mapping an income adjustment --> New GL Mapping
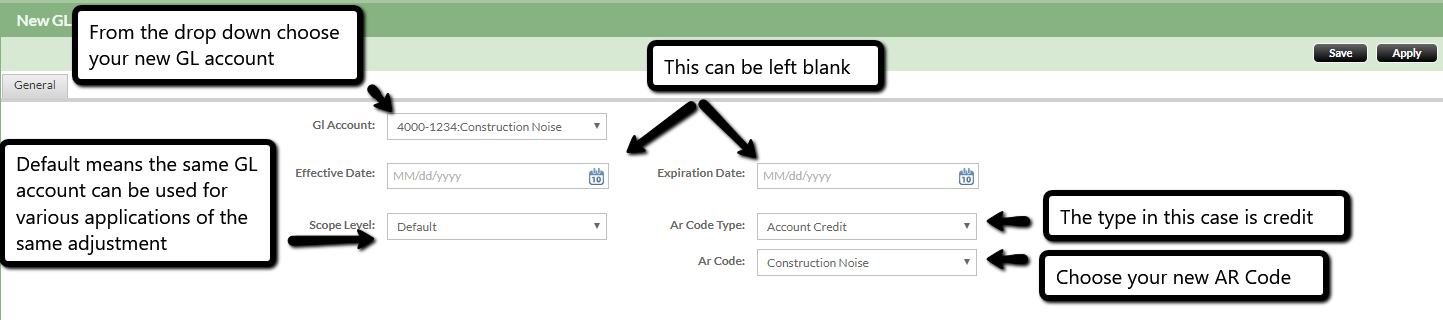
GL account- find your new GL account- 'construction noise'
For this you do not need to choose the effective and expiration date- just leave blank as they do not apply to this scenario- we are doing a 'one time' adjustment
Scope level
Default- this means that if you need to use this adjustment for various leases for different buildings and owners, it will show in the same GL account.
Property Owner- This is when you wish to for the charge to go to different GL accounts for different owners
Building- this is when you wish to the charge to go to a different Gl account for different buildings.
AR code type- account credit
Ar Code- construction noise
SAVE
You have now mapped your adjustment to the accounts as it will show in the list of GL mapping
Step 3
Now you need to add the adjustment you have made to the lease in question;
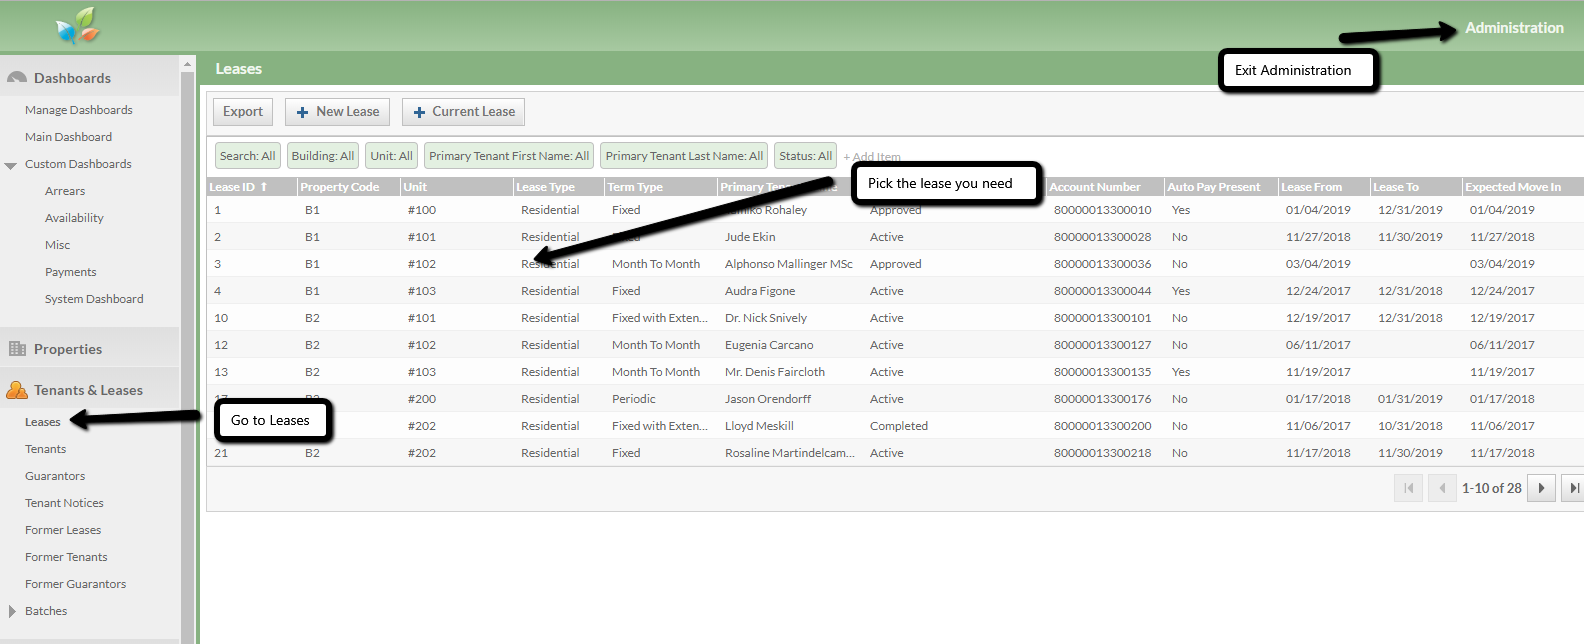
Exit Administration and go to 'lease' and pick the lease you wish to add this one time/ general adjustment.
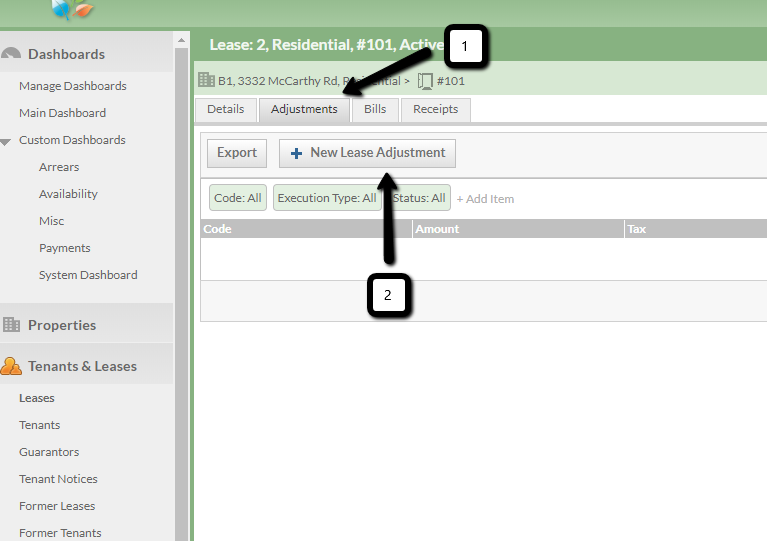
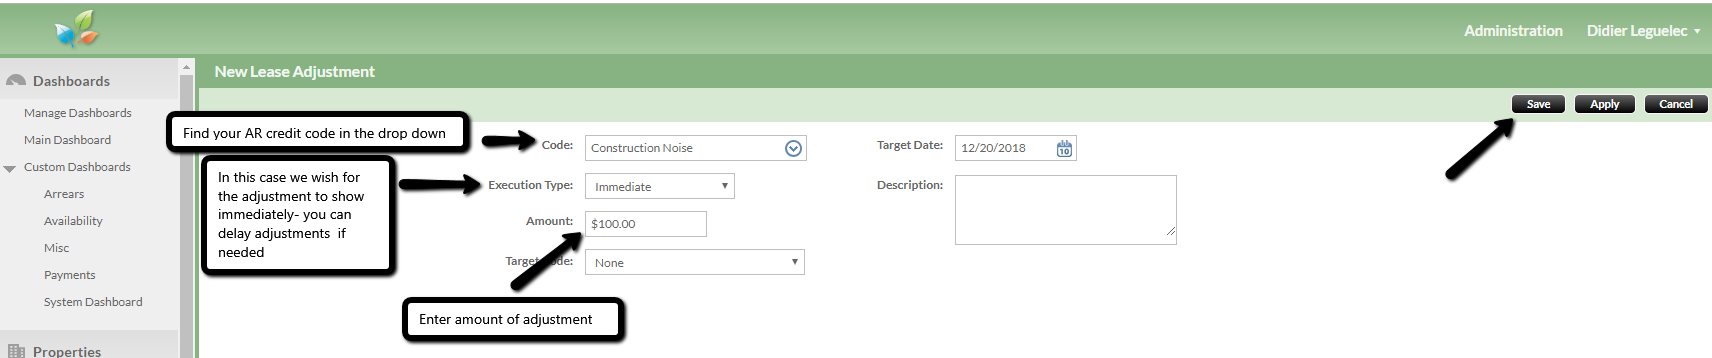
Top tabs--> Adjustments --> New Lease Adjustment
Code-> construction noise - you are choosing the adjustment code you previously created
Execution type-> this can be immediate or pending. For a one time adjustment you will likely be looking for this as an immediate adjustment
Amount-> In our example case, $100
This is all you have to fill in and you can click save -> actions -> submit

You have now created, mapped and linked your adjustment
Step 4
Checking your work Via the Lease
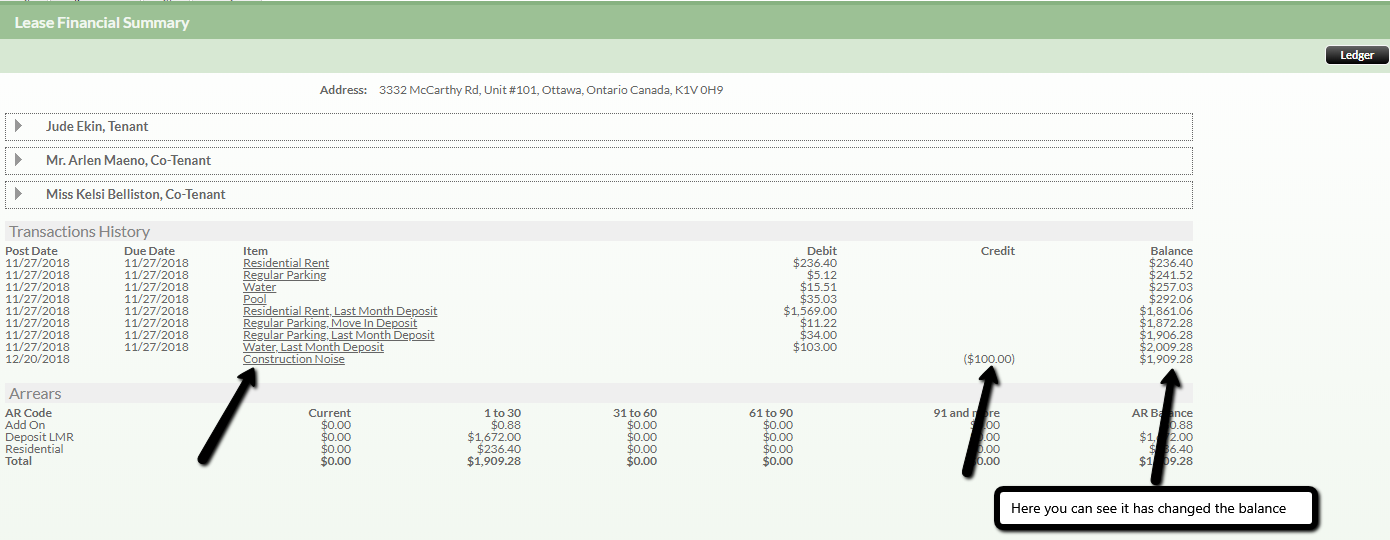
Go back to the lease in question -> Views -> Lease financial -> Summary
Here you will see your adjustment showing on the summary.
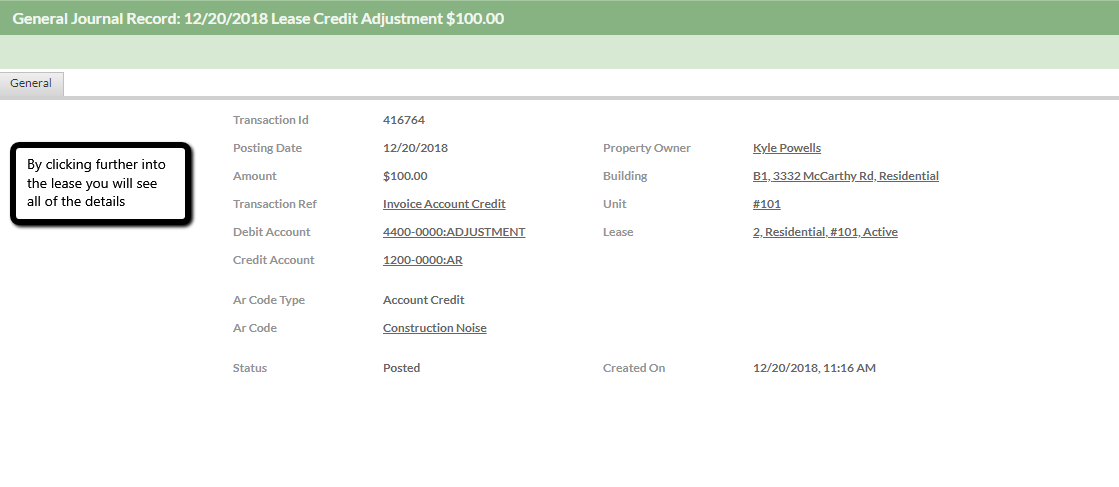
Checking your work Via the Accounting Side
Choose Finance -> Accounting -> General Journal.
Here you will see a long list of the records and the easiest way to find your new entry is to click 'ID' as this is sequential and therefore you will find the most recent entry at the top.
Click on your new record and you will see everything in more detail;
Congratulations- you have successfully created, mapped and linked your Adjustment!