This article will be describing how to create a new expense within the system.
Click on Finance -> Expenses ->Expenses -> + New Expense
General Tab
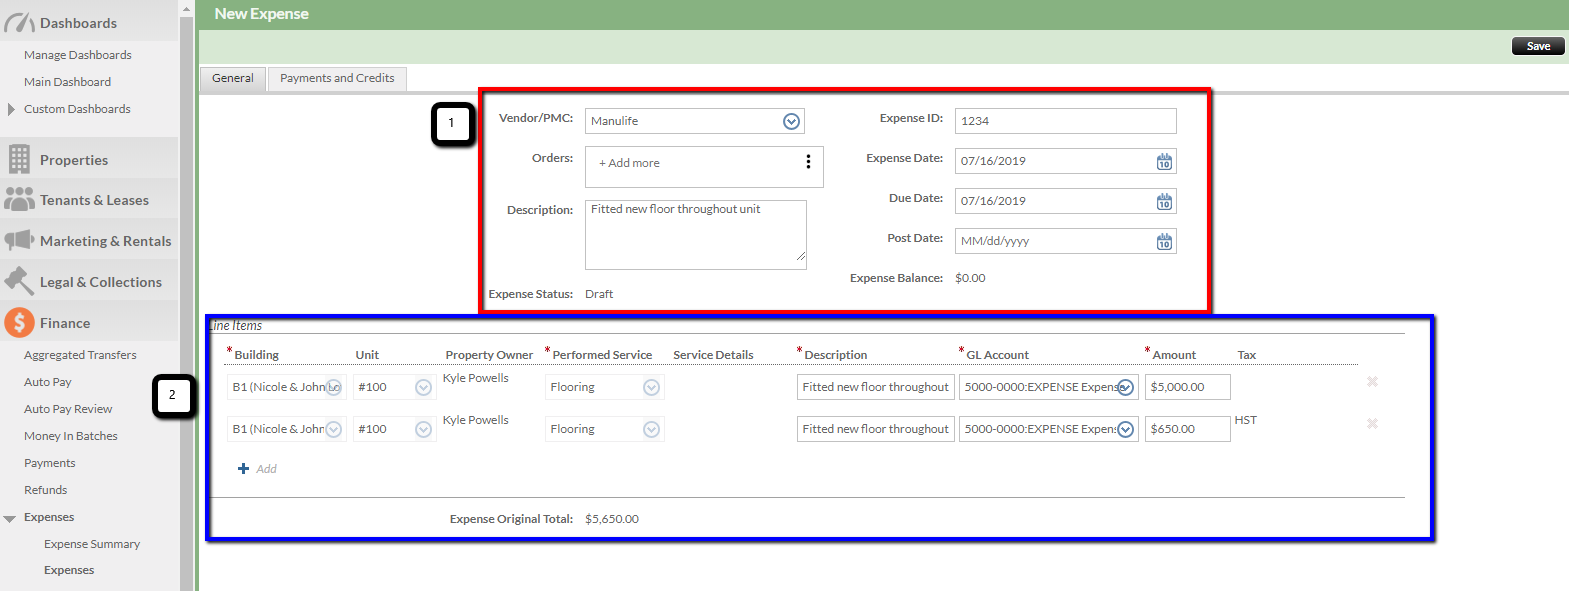
1- The first section of information is a mirror of the information you have received from your Vendor Invoice. You are inputting this in Property Vista to ensure you can record expenses received and expenses paid to each of your individual Vendors.
- Vendor- pick it from the drop down list of your vendors
- Expense ID- you can match this to the number on the invoice
- Expense Date- this is the date on the invoice
- Due Date- this is the date the payment to your vendor is due
If you have not yet set up your various Vendors please click HERE
2- The second section of information is 'Line Items'. These represent each single service performed by the Vendor. The image shows a line of Tax which can be added automatically if you have set this up. Please see HERE to do this.
Every Line Item consists of:
- Building and Performed Service (i.e. which building does the expense rely on and what service was performed by the vendor)
- GL Account – This drop down gives your expense GL account options to pick from. The line item GL account will automatically match the tax line item when generated but it can be changed manually.
- Amount – You will need to input the amount and the tax line item will be auto-calculated. You can update it manually if need be.
Line Items can be removed by clicking the red X on the right hand side. Removing line item will remove its tax lines as well.
Expense Original Total is auto-calculated as the sum of Amount in all line items.
Once you have completed the information- remember to hit 'save'.
At this point, your expense is in draft status and it can still be modified and re-saved but it cannot yet be paid.
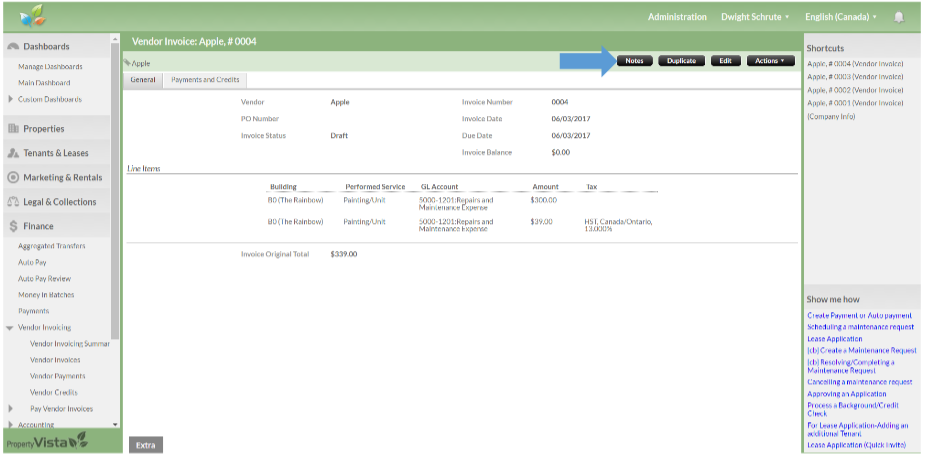
You can also attach electronic copy of original invoice using the NOTES button;

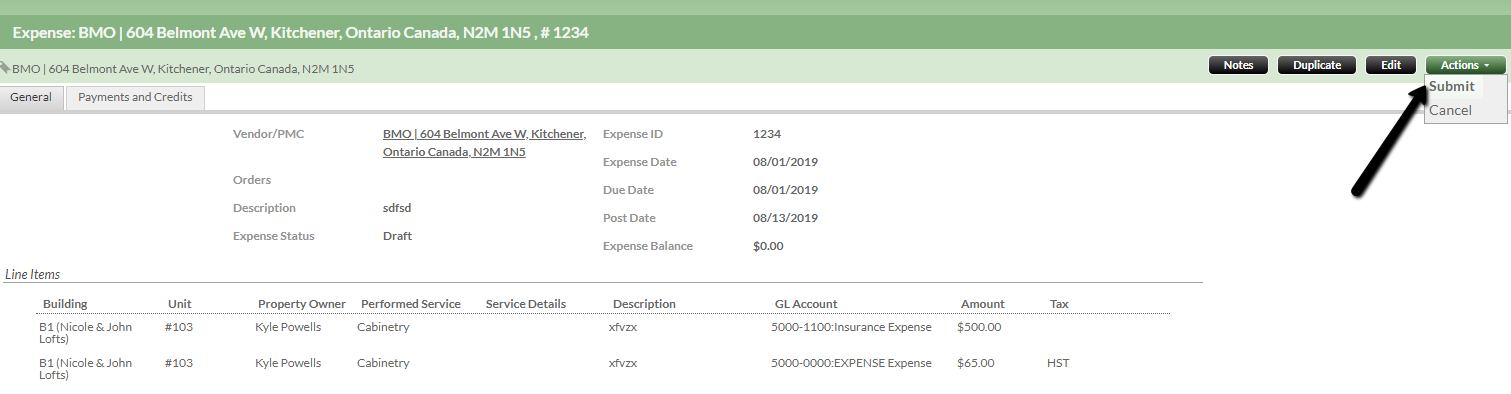
Once you are happy with all the information you can submit the expense- actions -> submit.
NOTE- you cannot change an expense one it has been submitted.
To pay your expense please click HERE