In order to obtain the highest conversion rates when it comes to the Resident Portal Registration we recommend the following strategy:
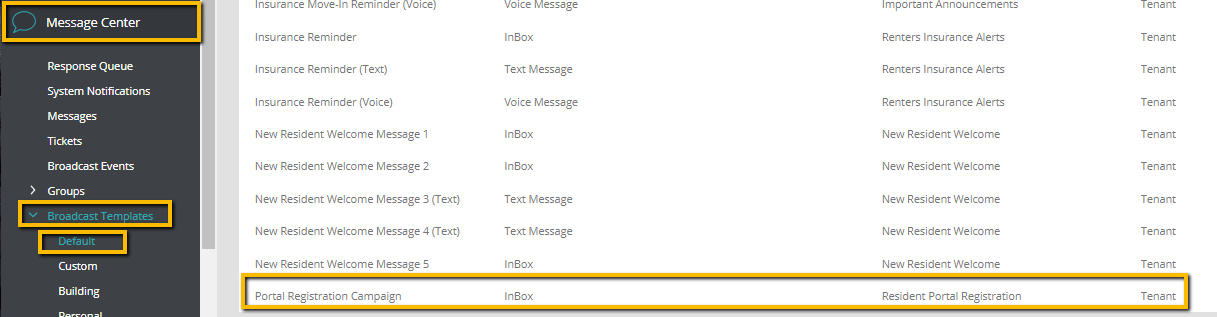
STEP 1: Navigate to Message Center → Broadcast Templates → Default → select Portal Registration Campaign
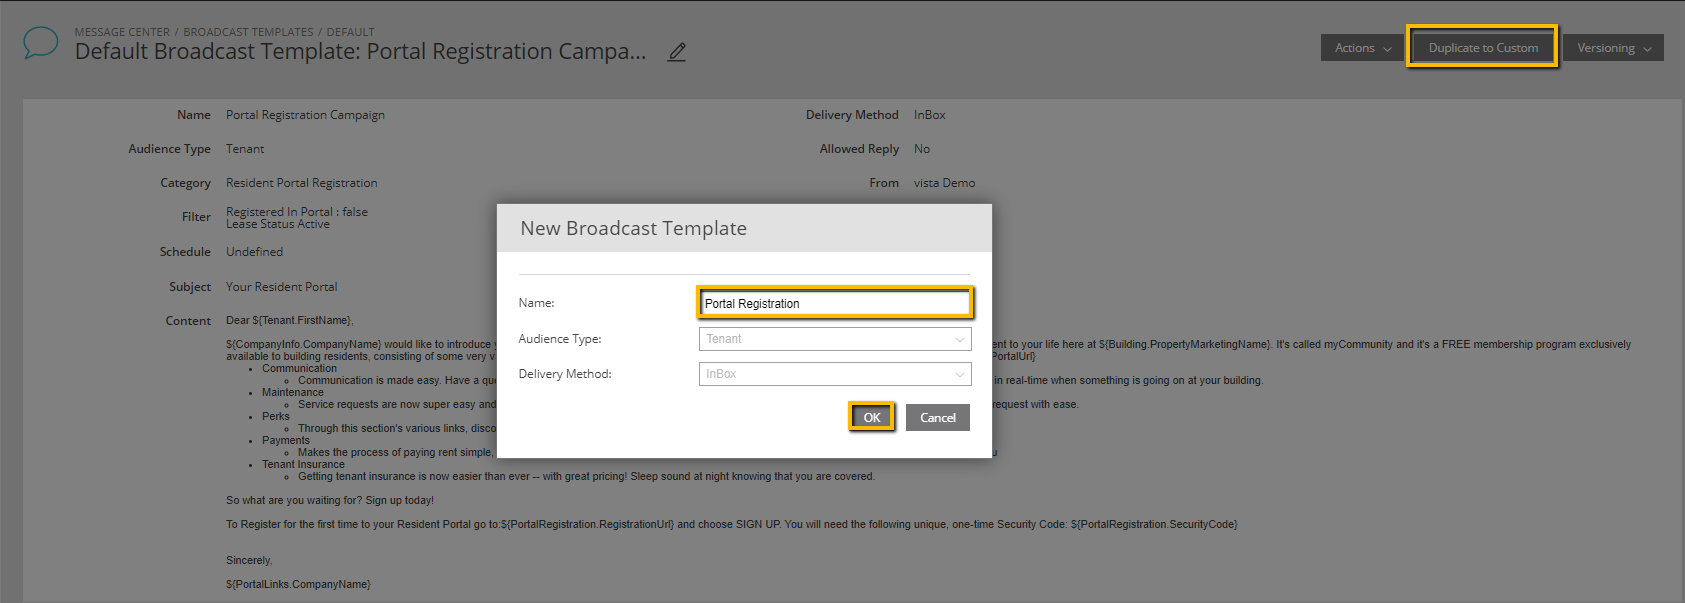
STEP 2: Select Duplicate to Custom → Fill out Name (Create a customized name or use the same as Default)
STEP 3: Review and customize Broadcast to best meet your business needs → Select Save once customizations are complete. If you are happy with this default template and are ready to schedule this Broadcast select save and continue to STEP 4.
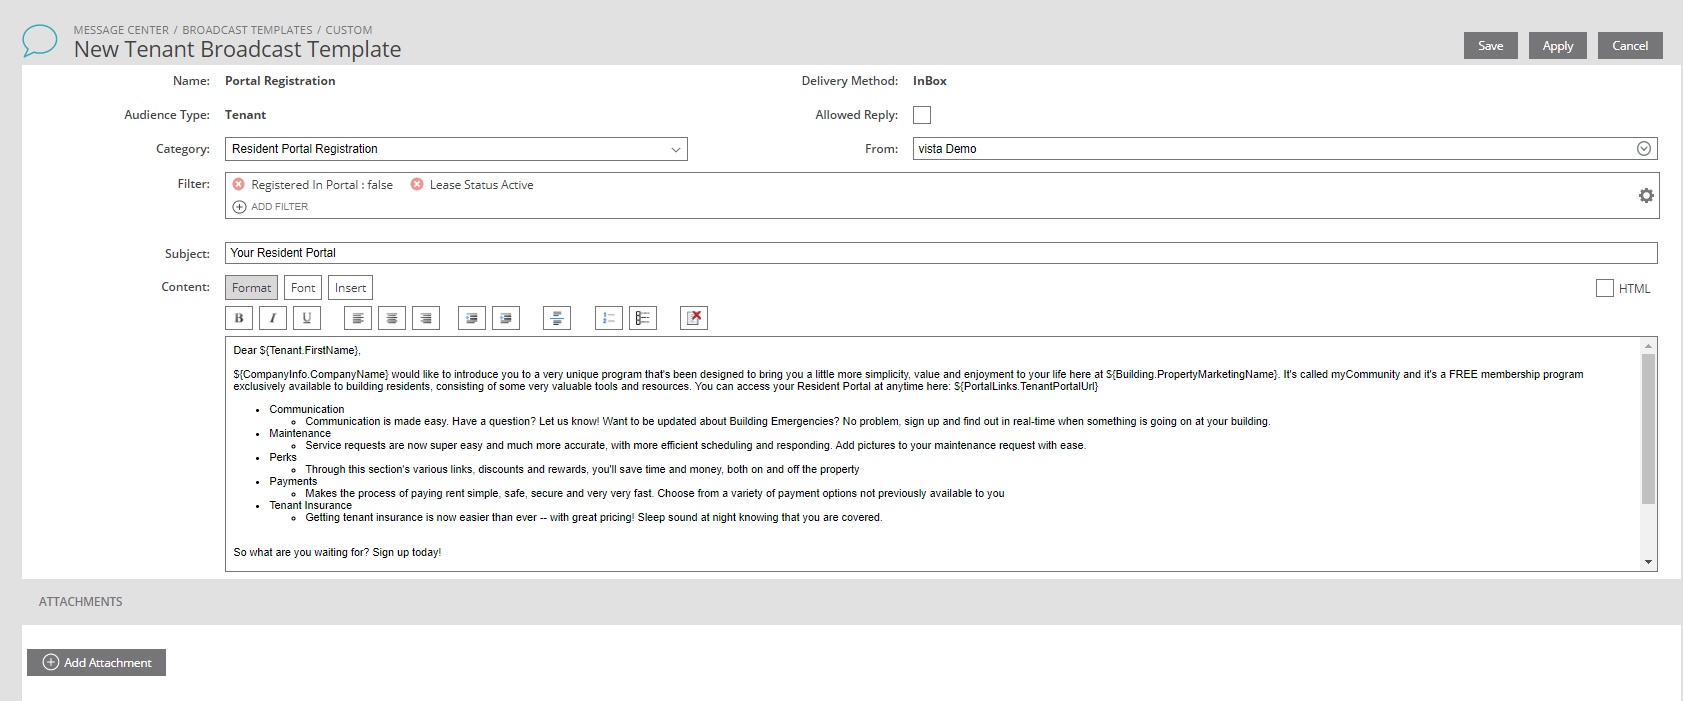
| Category | Recommended to leave as Resident Portal Registration so the roles assigned this category apply pertaining to who can view/respond to these communications within your company. |
| Filter |
Filters are used to choose your target audience to receive these communications. 2 Recommended Filters: Registered in Portal False → This filter will target all tenants who are not registered in the portal Lease Status Active → This filter will target only active leases |
| Subject | You can customize the Subject line for your Broadcast |
| Allowed Reply | If selected the recipients of this Broadcast will be able to reply to this Broadcast. If unselected the recipients will not be able to reply. |
| From | Can select who you would like the communication to come from. (If you have different owners/landlords/building names) |
| Content |
Can customize the content written in the body of the Broadcast. Note: It is recommended to leave the pre-set variables (e.g. ${PortalRegistration.SecurityCode} as they pull specific information from the CRM pertinent to this communication. If you would like to add more select Insert → Merge and select the variable
Note 2: It is recommended to remove the perks section of this broadcast as it is no longer in use by Property Vista |
| Add Attachments | You can upload any .pdf attachment you would like to go out with the broadcast. Please note: Attachments submitted are not released in the email. The tenant will still need to log into their tenant portal; to view the attachment itself. |

STEP 4: Select Versioning → Finalize

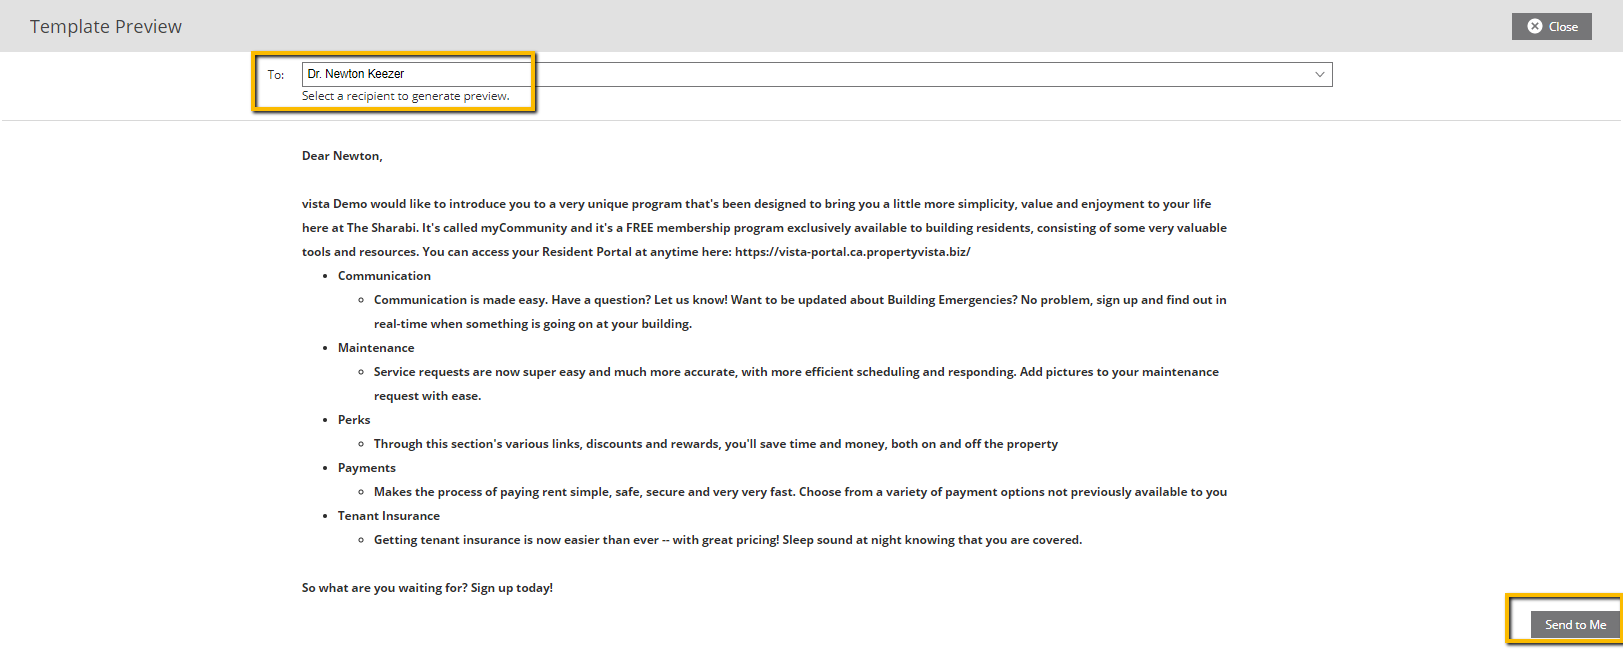
STEP 5: Preview the Broadcast. Navigate to Actions → Preview → Select a Tenant (this will not sent it to them but allows you the opportunity to review the broadcast with the information pulled from the variables). You can also select Send to me (This will send a copy of the Broadcast to you by email for your review). Once preview is completed select Close.

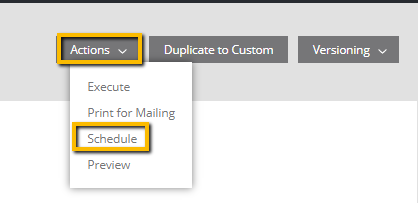
STEP 6: Now you are ready to schedule this Broadcast. Navigate to Actions → Schedule → Once areas are filled out select Save.
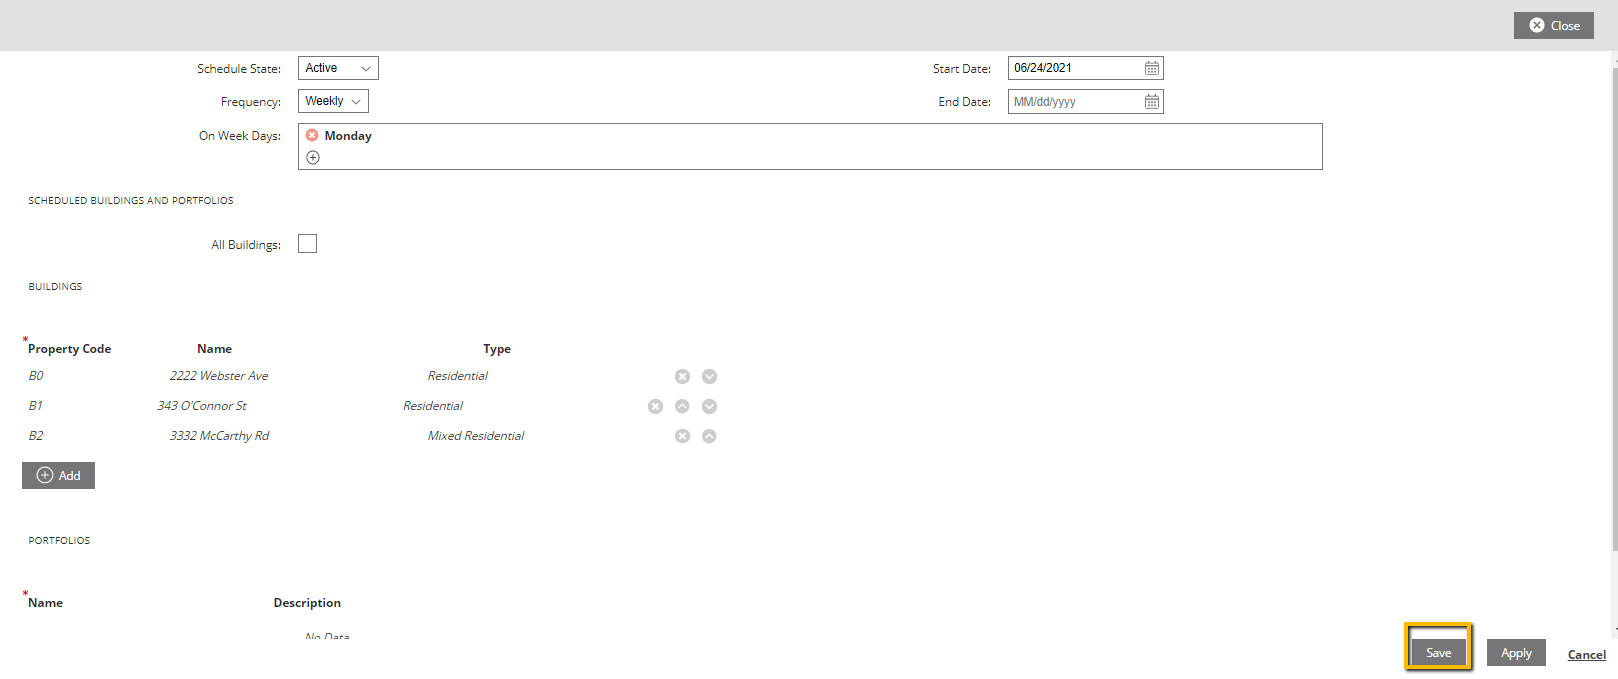
| Schedule State | Select Active if you are ready to start sending out this Broadcast |
| Frequency |
Choose whether you would like this Broadcast to be sent out Once, Daily, Weekly, Monthly. Note: It is recommended that this Broadcast is sent out weekly. |
| On Week Days (Appears when Weekly is selected only) | Select the day of the Week you would like Broadcasts to go out |
| Start Date | Select the start date you would like the Broadcasts to start |
| End Date | Select the end date you would like the Broadcasts to end. If you do not want these to end simply leave this area blank |
| All Buildings | Select if you want the broadcast to be sent to all your buildings |
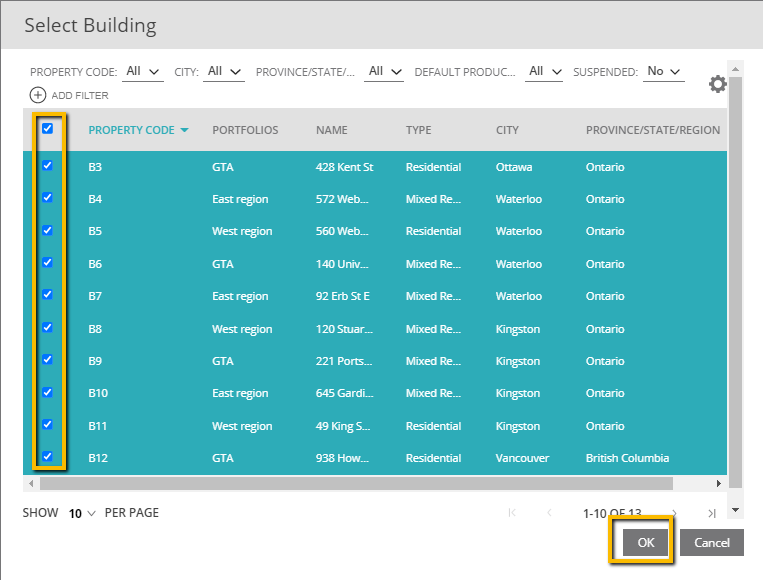
| Property Code → Add |
Add specific buildings you want to target this Broadcast for → Select OK
|
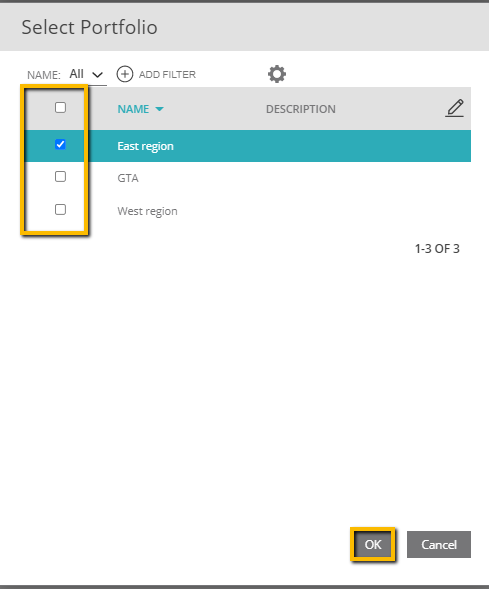
| Portfolios → Add |
If portfolios have been set up select the portfolio you want to Target this Broadcast for → Select OK
|
Once you have selected Save your Broadcast will be scheduled and the CRM will begin sending it out on the time frame you selected.
We have provided additional templates that can be used to create a multi-step communication campaign.